From zero to Git for WordPress teams
There’s one prerequisite that goes before anything else in order to use automation tools like Branch: You have to track your source in Git. If you are logging into servers and live editing code, you won’t be able to harvest any of the benefits of an automated deployment workflow.
- No code history,
- No automated error catching
- No Lighthouse page speed, accessibility and SEO checks
- No rolling back
- No Q/A process.
You get it.
Git is the ultimate prerequisite, but what if you aren’t using it yet? This guide aims to be a repository for the best resources for WordPress developer teams to get started with a Git workflow.
Contents
- Step 0: Go Local
- Step 1: Learn Git
- Step 2: Commit
- Step 3: Build, test, deploy. Repeat.
- Frequently Asked Questions
Step 0: Go Local
If you already have a local development environment, you can skip this section.
This section is for you if you are editing files directly on the server and haven’t yet set up a local development environment. Moving your development to your local machine is step zero. Each member of your team needs to do this. If you ask me, it should be the minimum requirement for a developer to contribute to a WordPress project. This is important so that no one can overwrite each other’s work.
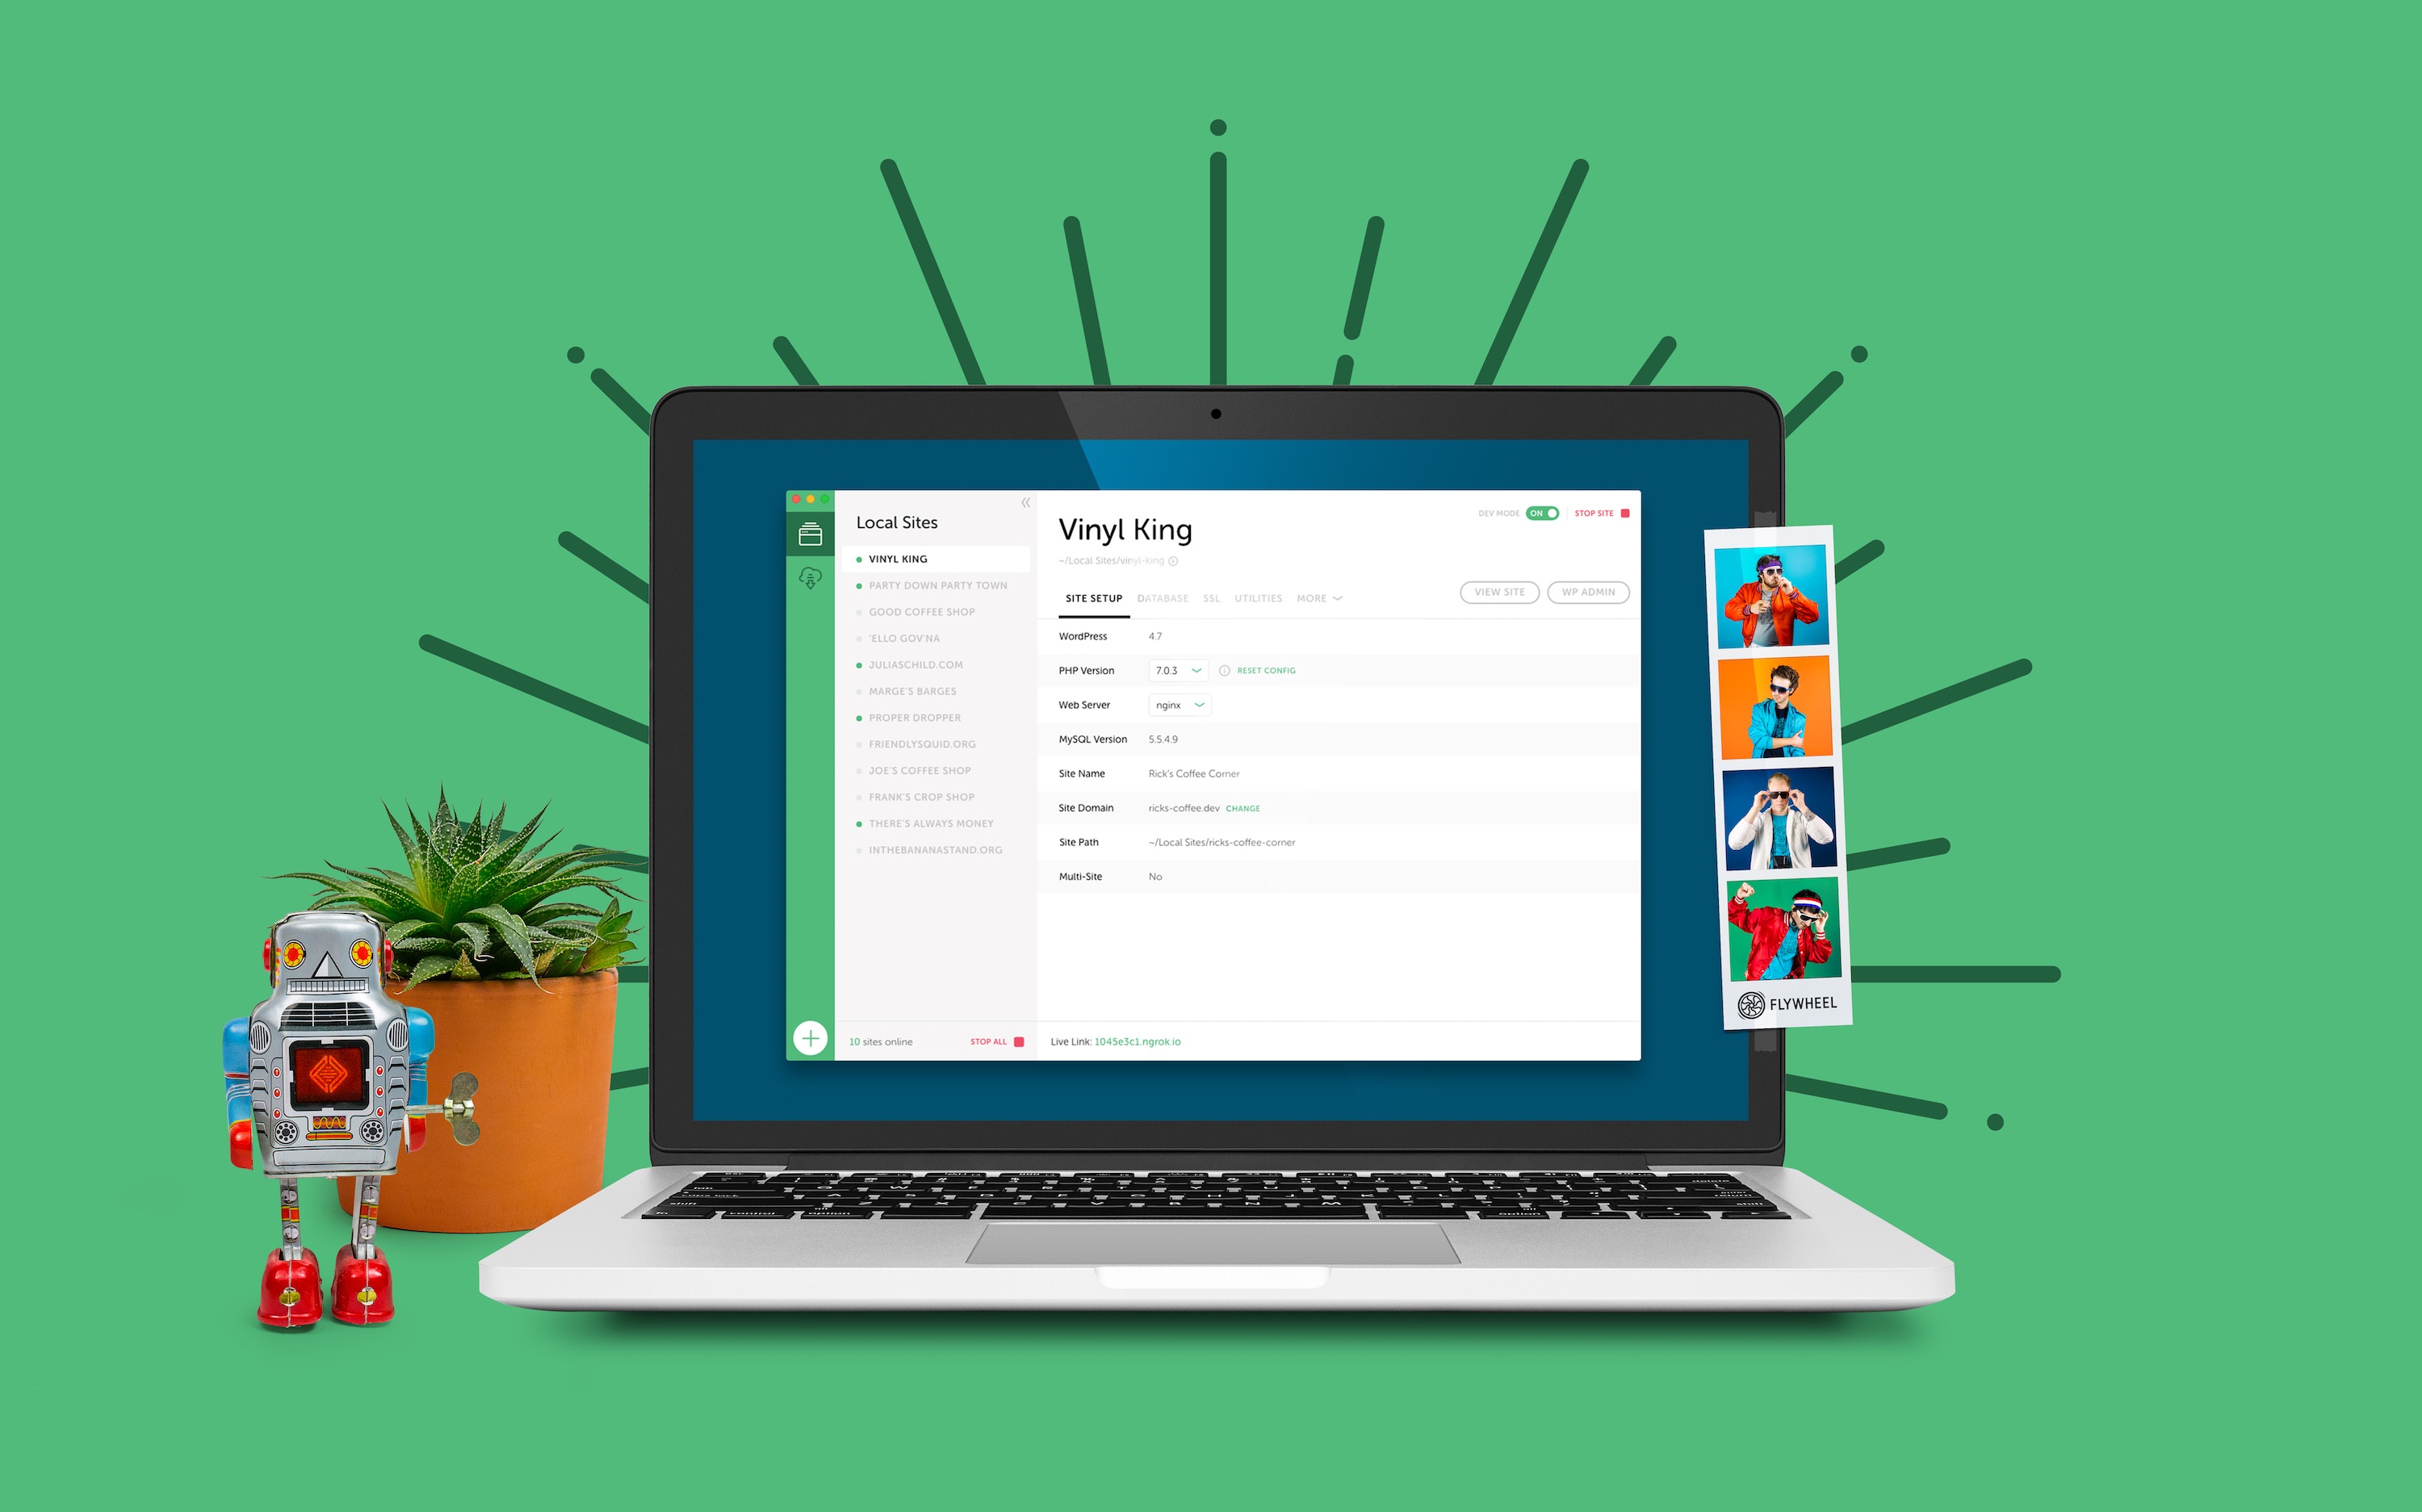
Unless they have another preference for some reason, each member of your team should download and install Local, a local development tool that’s maintained by Flywheel. For the large majority of WordPress developers, this is the best local development environment available and also the one that’s easiest to get started with.
One person on your team needs to be responsible for creating the Git repository and pushing the first version of the code. This team member needs to download the latest version of the live code into his local WordPress site. They then need to make the initial commit and push to GitHub (etc.) (see step 2). Once the code is pushed to GitHub, the rest of the team can clone the Git repository into their own local WordPress environment.
Resources:
Step 1: Learn Git
You don’t need to learn everything about Git in order to benefit from version control and automation. In fact, as long as you can get your code pushed to GitHub (et. al.) you can start to reap the benefits. You can learn the rest as you go – and you will quickly. Git is quite an impressive tool with a lot of advanced features, but most of the time you are using the same 3-4 features to get your work done.
Here are the absolute basics you should familiarize yourself with:
- Understand what Git is: You need a basic understanding of the concept of version control and Git. Most good tutorials or courses will start here.
- How to save your work: Committing your work to the Git repository and pushing to GitHub or one of the other Git hosting platforms is obviously something you’ll do a lot. Once you know how to do this, you know enough to be dangerous.
- How to work on branches: If you are a team, it’s worth spending a bit of time familiarizing yourself with the concept of branches. Once you and your teammates are able to work on your own branches and open pull requests to get your changes merged into the main branch, you will never want to go back to the old world.
- The pull request workflow: The pull request workflow is the recommended way to work as a team using Git. We’ve described it in the FAQ section of this guide.
Command-line? No, thank you.
If working in the command-line feels intimidating, don’t worry. It’s absolutely fine to work with a Git GUI client. Using a GUI client will make Git seem more familiar and similar to other tools you are used to already. Committing your code will feel more like good old “Save as …“. You can always go to the command-line if you really need it at a later point. For now, you’ll be fine with a GUI client.
A great free Git GUI client is GitHub Desktop. It’s made by, you guessed it, GitHub. Another great client is Tower. Pick the one you like best.
Resources to learn the basics of Git:
- The Git book is the ultimate Git resource (also contains a few videos)
- Learn Version Control with Git by the folks behind the Tower Git client – lots of written content and videos, both for command-line and GUI
Step 2: Commit
Step number 2 is committing. Implementing a Git workflow requires commitment from you and your team. Commit to the follow rules:
- Make it a basic requirement that everyone uses Git
- Decide that the Git repository is always the source of truth
- Never allow the live site to get out of sync by editing files directly
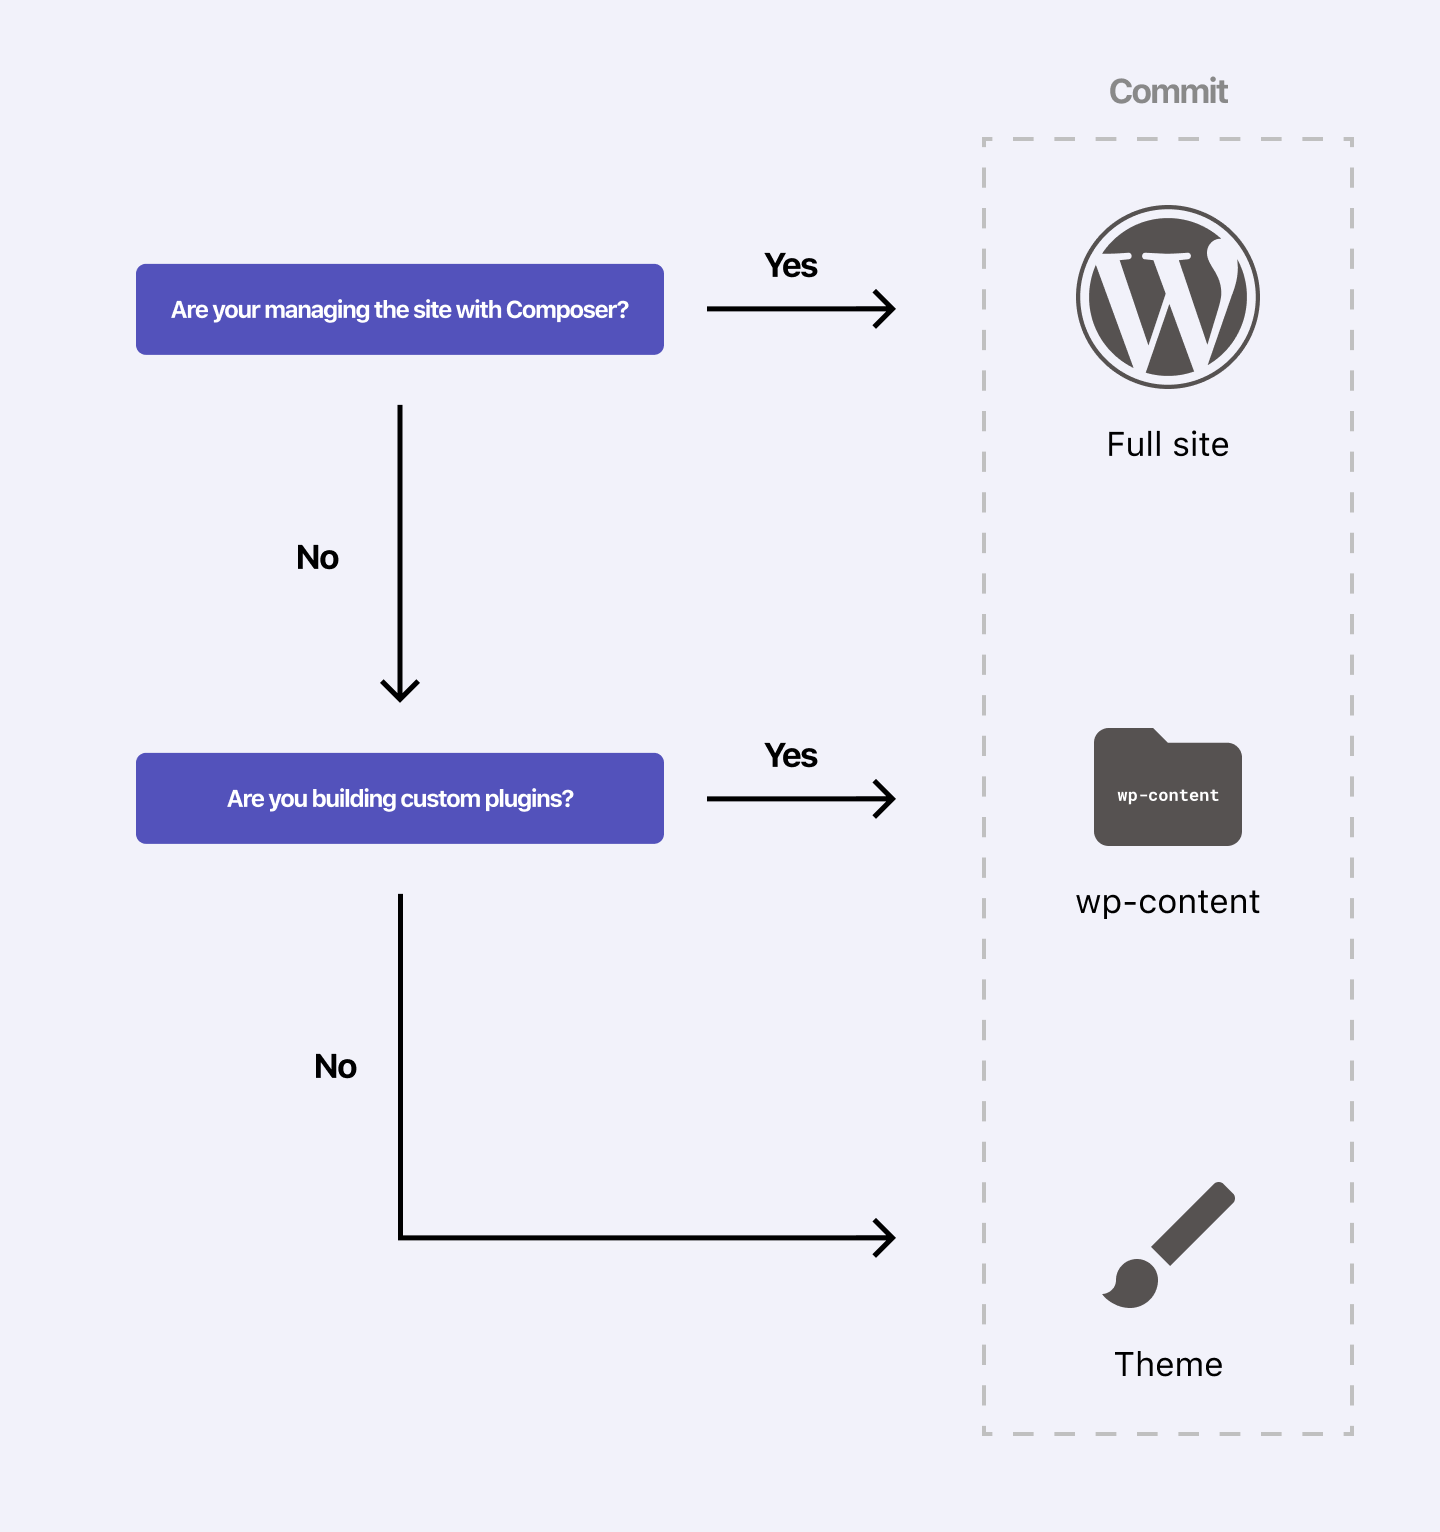
When it comes to actually commit your work, you need to figure out what goes into your Git repository. Overall, I’ve seen 3 different versions of this:
- Commit the full site
- Commit the
wp-contentfolder (minus theuploadsfolder, which can never, ever go on GitHub!) - Commit a theme or plugin (most common)
The following flow chart helps you decide what to commit:
Once you have decided what will go into your Git repository, you need to add a .gitignore file. This file will tell Git which files to ignore so they won’t be included in the repository. Files like user uploads, environment files etc. should be excluded. If you are committing the wp-content folder, ignore everything in the plugins and themes folders except the custom theme and plugin(s). Only code should go into your Git repository – and mostly your own code. Content doesn’t belong.
Step 3: Build, test, deploy. Repeat.
On the first run, someone from your team needs to set up the Git repository and push from their local machine to the remote Git repository. The rest of your team then clones the repository to their local environment which is where they will make changes to the code going forward.
From now on, all code changes will be flowing from a local environment to GitHub to the server:

As you can see in the graphic above, Branch (our automated deployment solution) fits in between GitHub and the server. A tool like Branch is essential unless you want to manually upload the files to the server after you already pushed them to GitHub. By adopting a Git based workflow you can now reap the benefits of automated building, testing and deployment for your project.
If you project has any sort of dependencies (using npm or Composer), you don’t want to push all those 3rd party libraries to GitHub. If you have build steps (like compiling your styles and JavaScript), having everyone run the build scripts locally and commit can cause a lot of unexpected behavior. By having an automated deployment solution that always run your build scripts the same way every time (and remembers to run the pro script and not the dev script) you will run into less problems. This is also where you want to add a few tests and Q/A steps, such as scanning your code for syntax errors and running Lighthouse to make sure your page speed, SEO score and accessibility hasn’t been affected by the new code.
Frequently Asked Questions
The 3 (4) steps above are the absolute basics to get started with a Git based workflow for your WordPress project. If you want to dive a little deeper, go ahead and read our answers to the most frequently asked questions we get about this workflow.
- What are the most important team habits?
- What’s the workflow for making changes?
- How about the database?
» What are the most important team habits?
TL;DR: Use branches.
When you are working on the same code base as a team it is essential that each of you are working on your own branch. If not, you will overwrite each other’s work and run into countless merge conflicts on the main branch. You will not have gained much, if any, benefit from adopting a Git based workflow if you don’t. Agreed, there’s a learning curve, but there’s not much to do about it unfortunately.
The way you get your code merged from your feature branch and onto the main branch is by opening a pull request on GitHub. This is a way of saying “I want this batch of code merged into the main branch please” and is a place where team members can review and discuss the changes. It’s a great idea to open a work-in-progress (WIP) pull request as early as possible, so other team members can see your work and give you feedback. I recommend that you adopt the “pull request workflow”, which is described here.
» What’s the workflow for making changes?
Sometimes, pushing directly to the main branch can be okay. If it’s just one person working on the project, pushing to the main branch might be just fine. However, there are still many benefits to working on branches. For example, you can be working on two new features synchronously and merge one when it’s ready, without waiting for the other to be deployable.
It is highly recommend that your team adopts the pull request workflow, which is a tried and tested way for teams to build software together. The workflow is pictured in the graphics below:
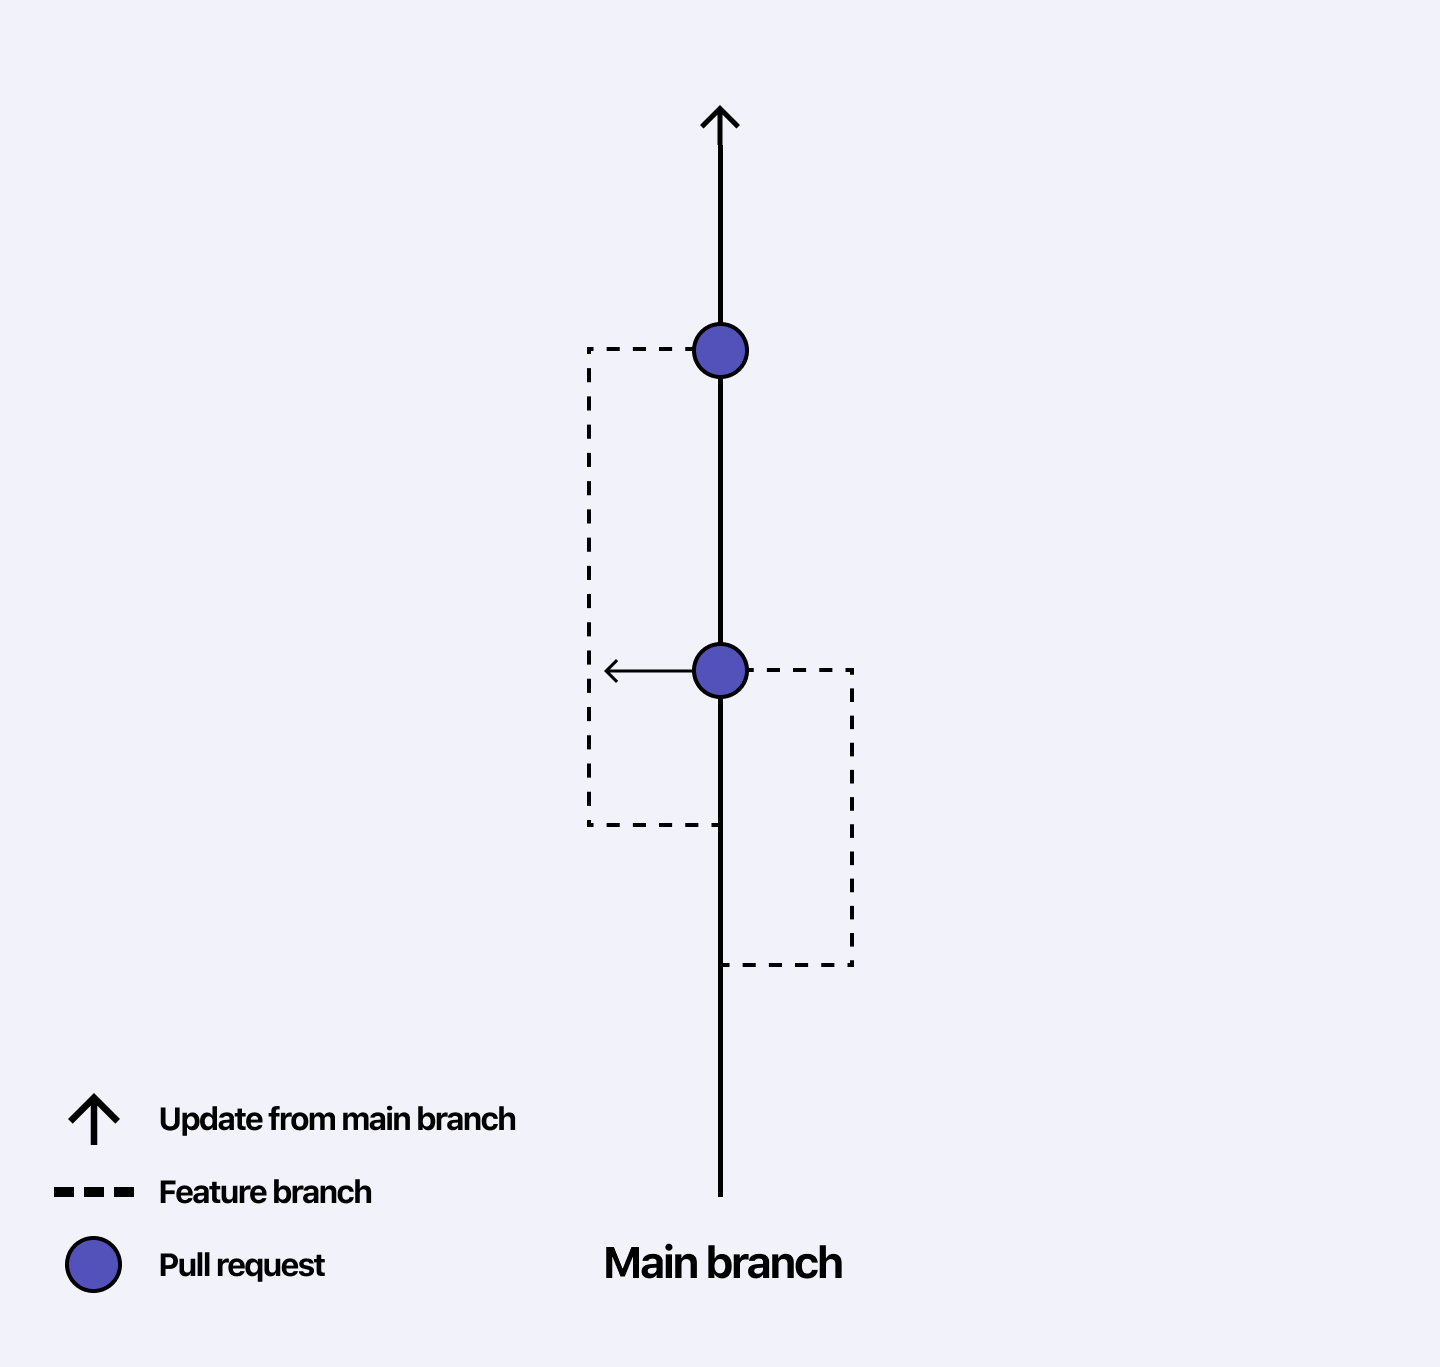
It’s actually pretty simple: Each team member works on their own branch. When they are ready to submit their changes to the main branch (which should mean it’s ready to be deployed), they ask to get their pull request merged.
If you look at the graphic above, the branch on the left side is created first. Next, the branch on the right is created. Both branches are branching out from the main branch. When the first branch is merged, the second branch is now out of date, because it’s based on an old version of the main branch. It can therefore be preferable to merge in the new changes from the main branch to the feature branch if the two branches are touching the same area of the code base.
» How about the database?
Where do I begin … This one is a big mouthful! However, we get the question all the time, so I’ll try my best to answer it. First of all, you need to distinguish development from content creation. Editing code is development and adding stuff to the database is content creation. That means that if you are using a page builder to design a WordPress page, you are creating content. Database changes don’t go into your Git repositories, so the deployment (merging) of the data works a little different.
Next thing: If you can avoid having to deploy/merge database changes, do that. The more stuff about your WordPress site you can manage with code, the easier your life will be. Page builders are a great way for your client to make small tweaks to their site, but if you are aiming to use a Git based development workflow, try to minimize the use of page builders.
Finally, if you can’t avoid it, here are a few tips:
- See if your WordPress host offer a tool to facilitate database deployment and merging. Examples are WP Engine’s copy tool and Pantheon’s WebOps workflow.
- Work with staging sites and use a tool like Duplicator or WP Migrate DB to move the database or WP Merge to merge the database.
- Work on a draft revision of your page with a plugin like Revisionize (no block editor support yet). If you are using Elementor, duplicate your work before you start to work on the new version.
- If you are working with the block editor, you can use reusable blocks in creative ways to achieve a sort of versioning of your content.
This is my ten cent on the database question. Let me know if you have solved it in a different way or want me to go deeper on something.
Sign up to Branch
Signing up for a Branch account is easy. Just head over to branchci.com and sign up with GitHub, Bitbucket or GitLab.
Need Help?
We hope this guide has been helpful, but if you still have any questions or feedback, or if you just want to say ‘hi’, please reach out by clicking the chat icon or by email at hi@branchci.com. Don’t be a stranger!