Getting Started with Branch
Introduction
Branch is a continuous integration and deployment platform, designed to help you automate the building, testing and deployment of your WordPress projects whenever you push to Git.
This guide will take you through all the steps you need to set up a Branch account, connect it to your existing WordPress projects and configure your Continuous Integration and Deployment (CI/CD) pipeline to streamline your workflow.
Contents
- Hello, Branch!
- Signing up for a Branch account
- Set up a new project on Branch
- Connect Branch to your hosting platform
- Add build steps
- Run your first build
- What about the database?
- Summary
Hello, Branch!
Branch is a continuous integration and deployment (CI/CD) platform built especially for WordPress developers. Every product decision has been made with the needs of WordPress developers in mind.
Branch comes prepacked with a variety of different recipes to help you automatically build, test and deploy your WordPress projects.
When you sign up to Branch, it connects to your GitHub, GitLab or Bitbucket account. This is cool for a few different reasons:
- It lets Branch listen out for changes to your codebase and run builds whenever something changes.
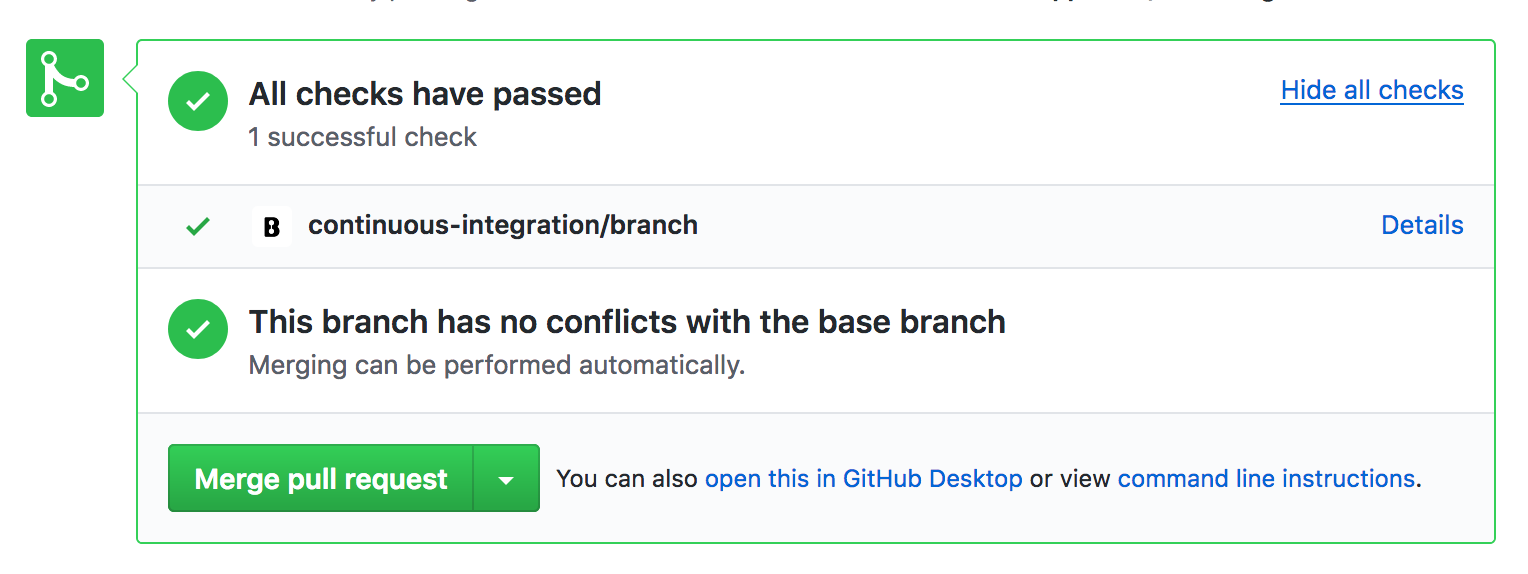
- It lets Branch hook into your pull requests and show the status of your builds. You don’t want to merge a pull request with a broken build!
- Finally, it lets Branch automatically run all the provisioning for your projects, for example, exchanging SSH keys and setting up webhooks.
Signing up for a Branch account
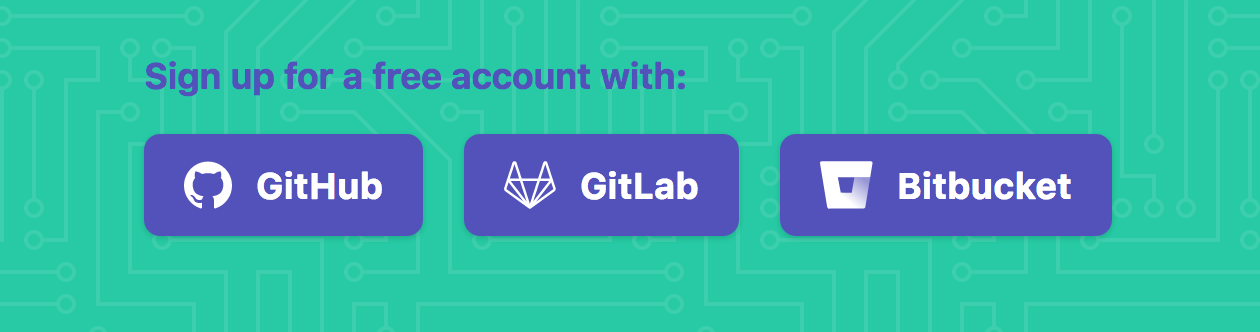
Signing up to Branch is easy and free — all you need is a GitHub, Bitbucket or GitLab account.
Once you have an account, you can run 20 builds and deployments for free every month, with the option to upgrade to a paid plan for more.
To sign up from the Branch homepage:
- Select the Git provider you would like to use (either GitHub, GitLab or Bitbucket)
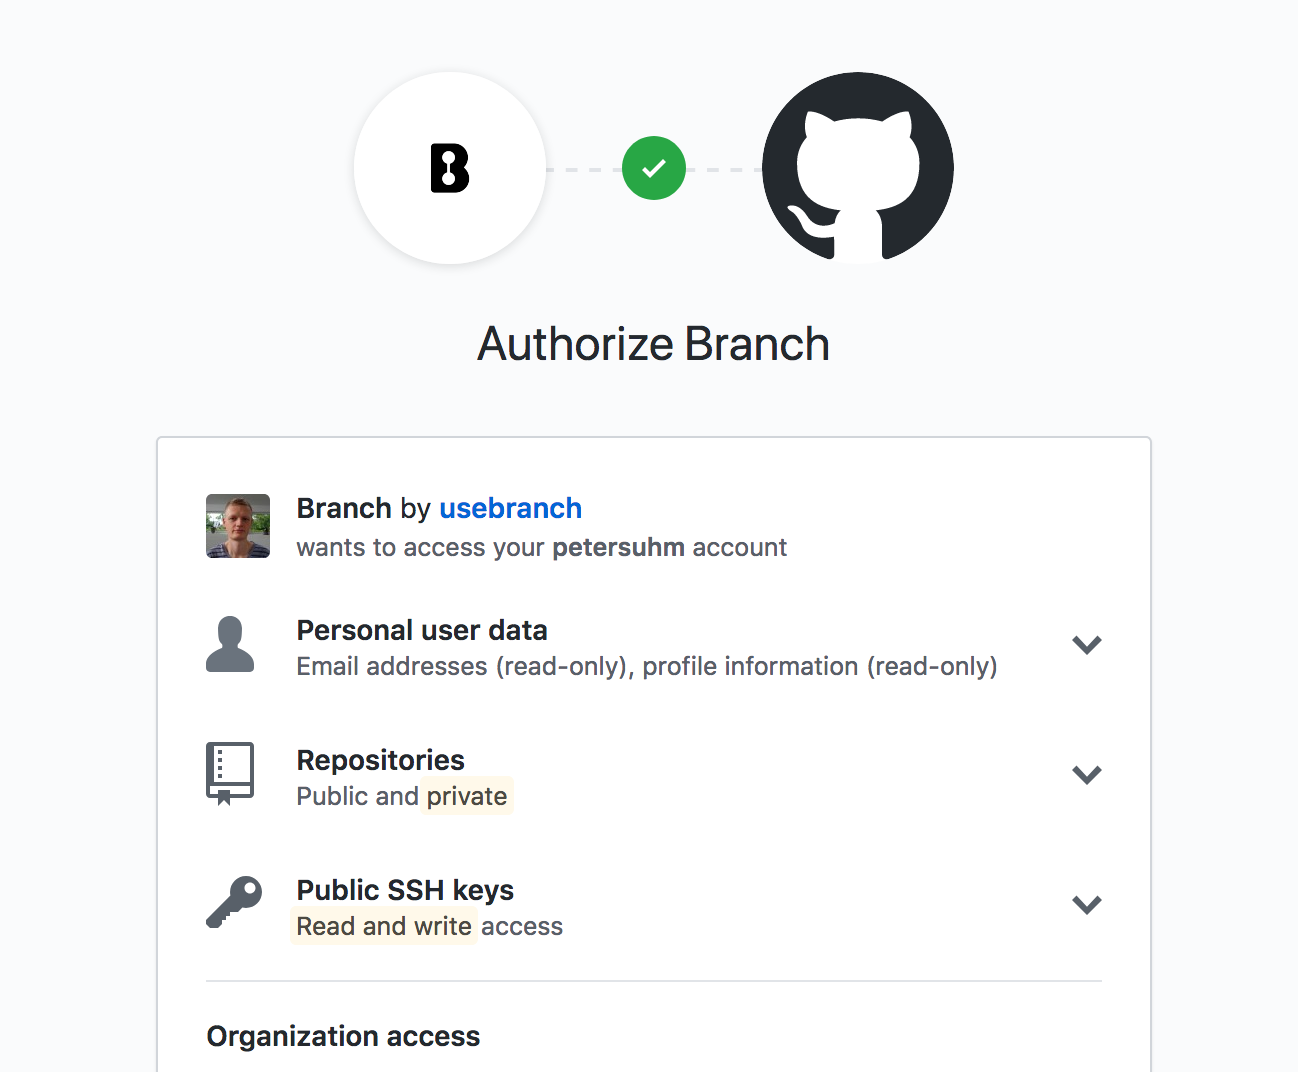
- After clicking, you will be redirected to your chosen Git provider’s website where you’ll be prompted to log in and authorize Branch to access your account.
Note: it’s important that Branch has access to the organization hosting the project you will be using.
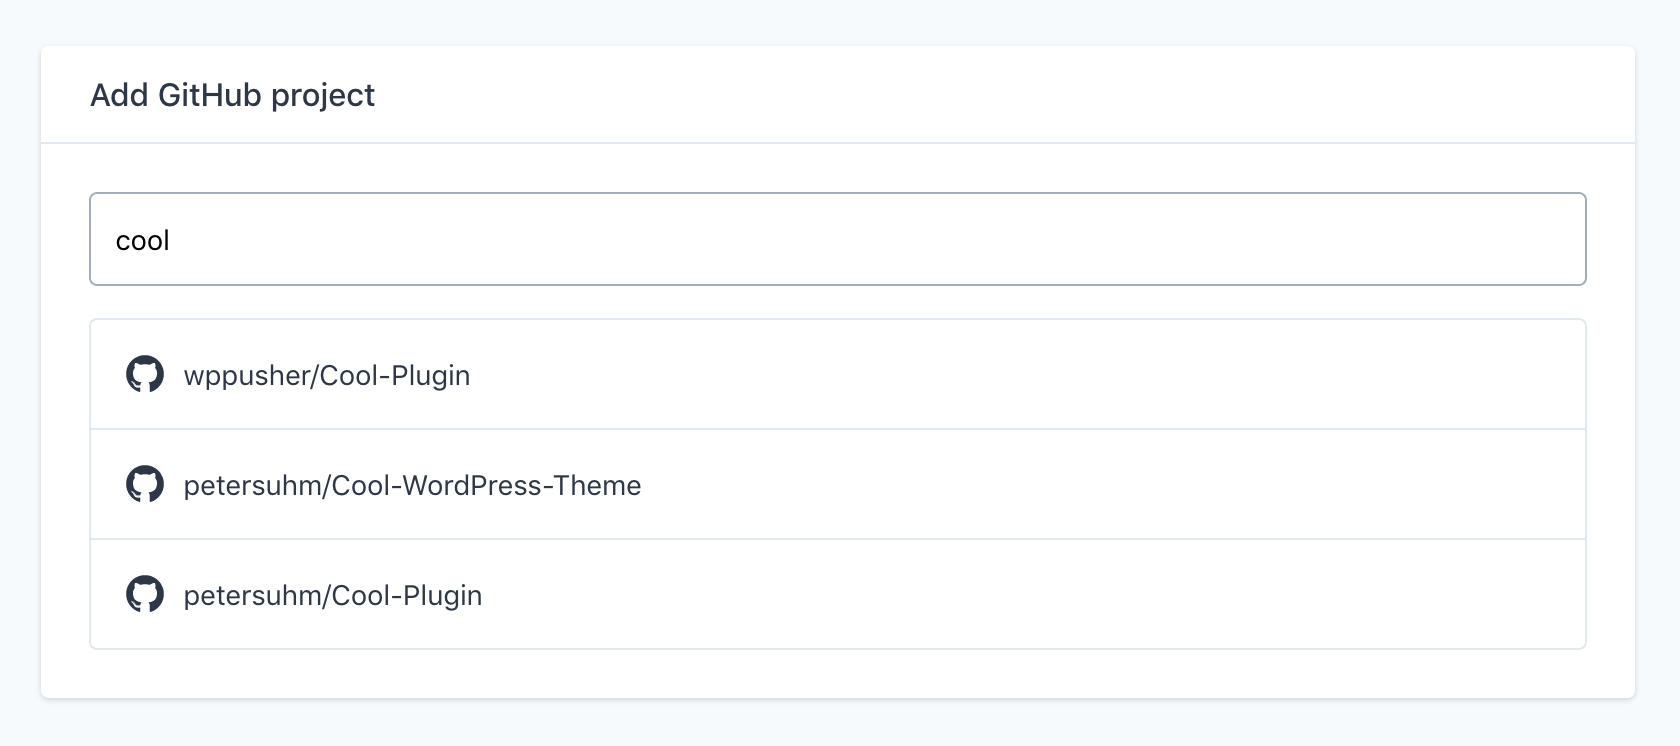
Set up a new project on Branch
Next, you will be prompted to pick a project. Start entering the name of your chosen project to see a list of matching Git repositories and select the correct one.
You can connect Branch to any Git repository containing a theme, a plugin, a full WordPress site, or any combination of the above.
After selecting a project, Branch will do the following to connect to your Git provider:
- Add an SSH key associated with the project. This lets Branch clone the repository.
- Add a webhook to the repository. This lets Branch know when there are new commits and pull requests to build.
Once your new project has been created, you will be redirected to the project configuration screen on your Branch dashboard.
This is where you’ll add your build and test steps. This is also where you can manage your settings and add (secret encrypted) variables to your Branch build environment.
Connect Branch to your hosting platform
Before you add your first build step, you will need to connect Branch to your hosting platform.
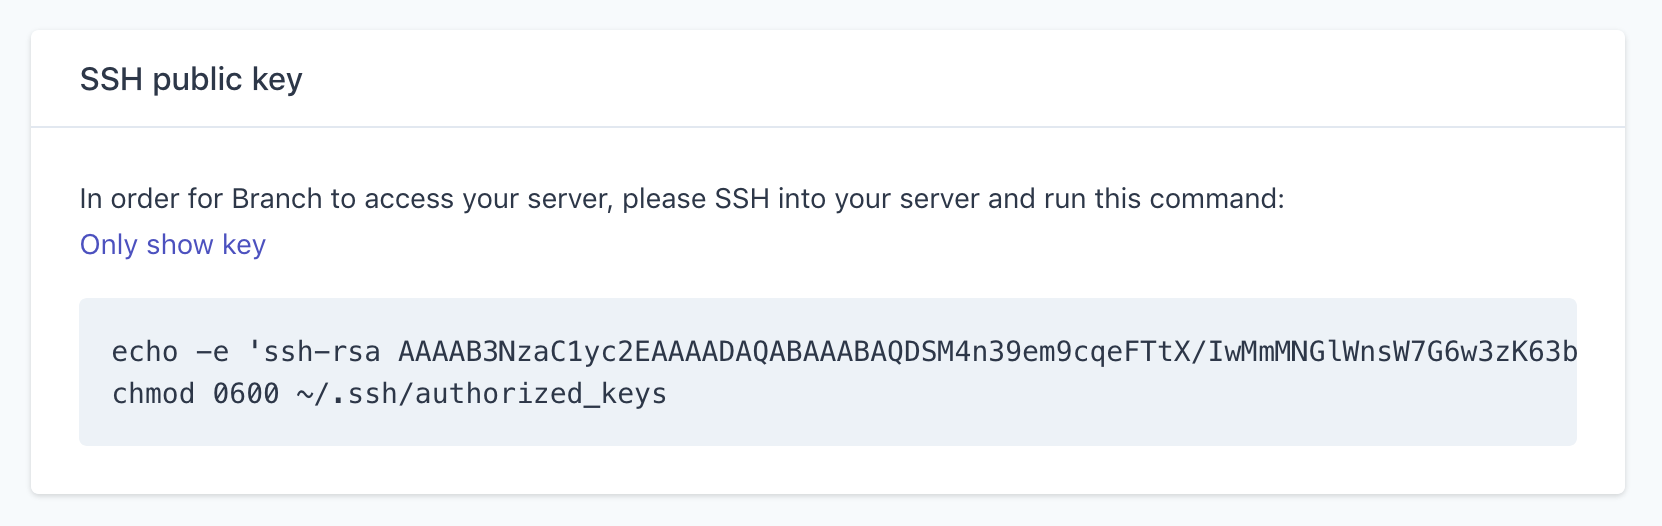
This typically involves adding your project’s SSH key from Branch to your hosting platform account by taking the following steps:
- Select your project from your Branch dashboard
- Click Settings and scroll down to find your project’s SSH key under SSH public key
- Click Only show key and copy the entire key to your clipboard
- Log in to your hosting platform account and find the location to add SSH keys
- Paste your Branch SSH key and wait for confirmation that it has been imported successfully
For more information on how to add the SSH key, take a look at our platform-specific guides (more coming soon):
Fear not! If your host is not on the list you can still deploy using the rsync or SFTP recipes in Branch.
Now Branch can connect to your hosting platform account, it’s time to head back into your Branch dashboard to start adding build and test steps to your project.
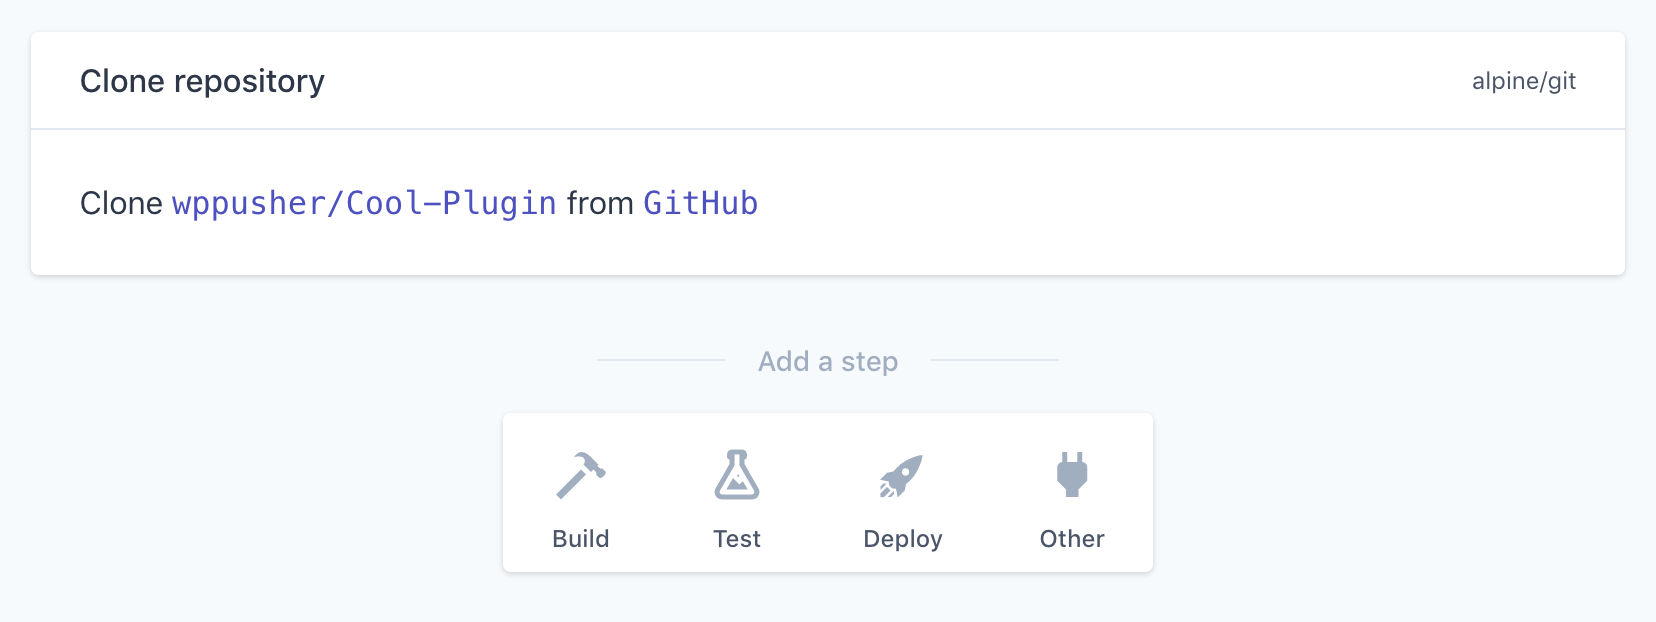
Add build steps
To add a build step:
- Click into your project from your Branch dashboard and select Pipeline
- From here, you can start adding your build steps. Scroll down to the section Add your first build step and click Add build step.
You have the choice to either use one of Branch’s prepacked build recipes or define your own custom steps.
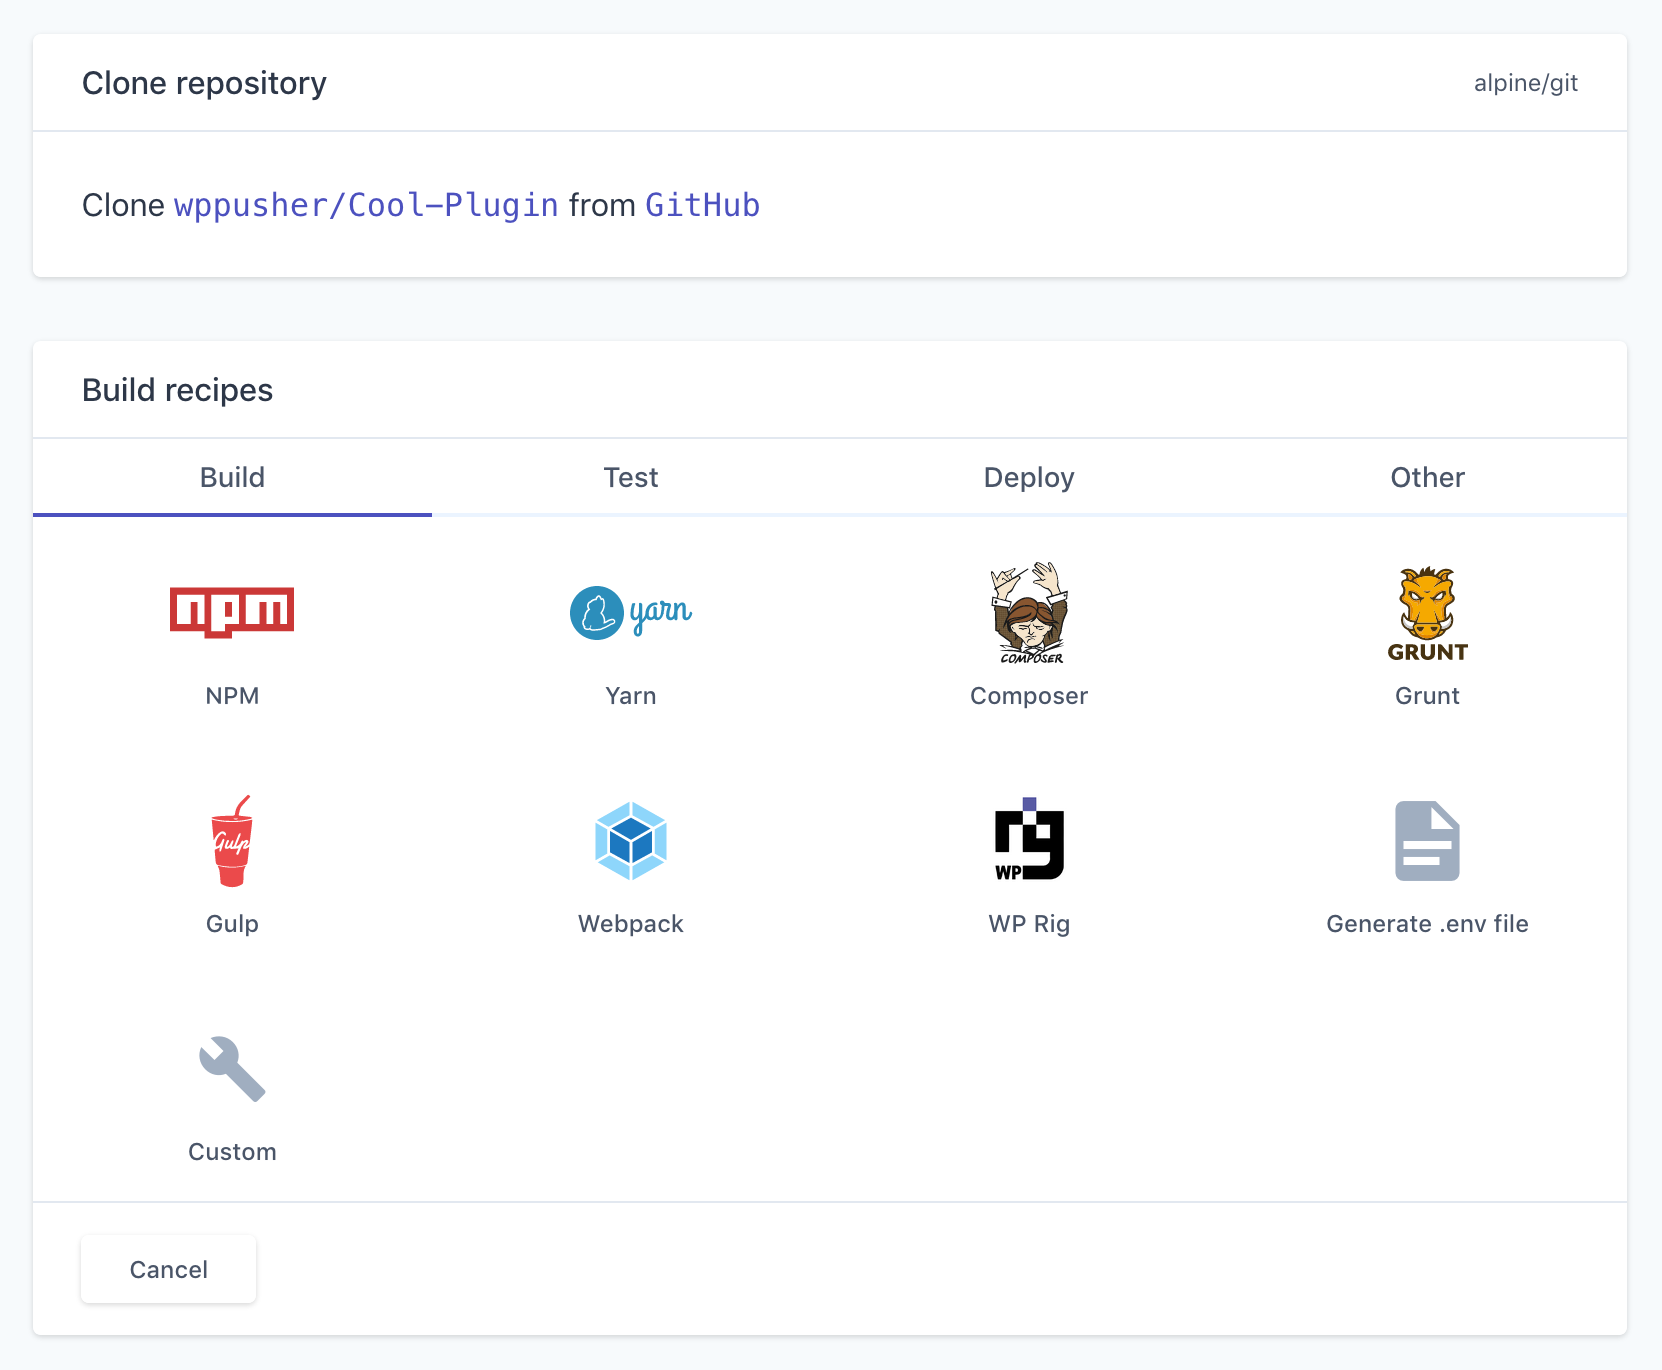
Common build steps
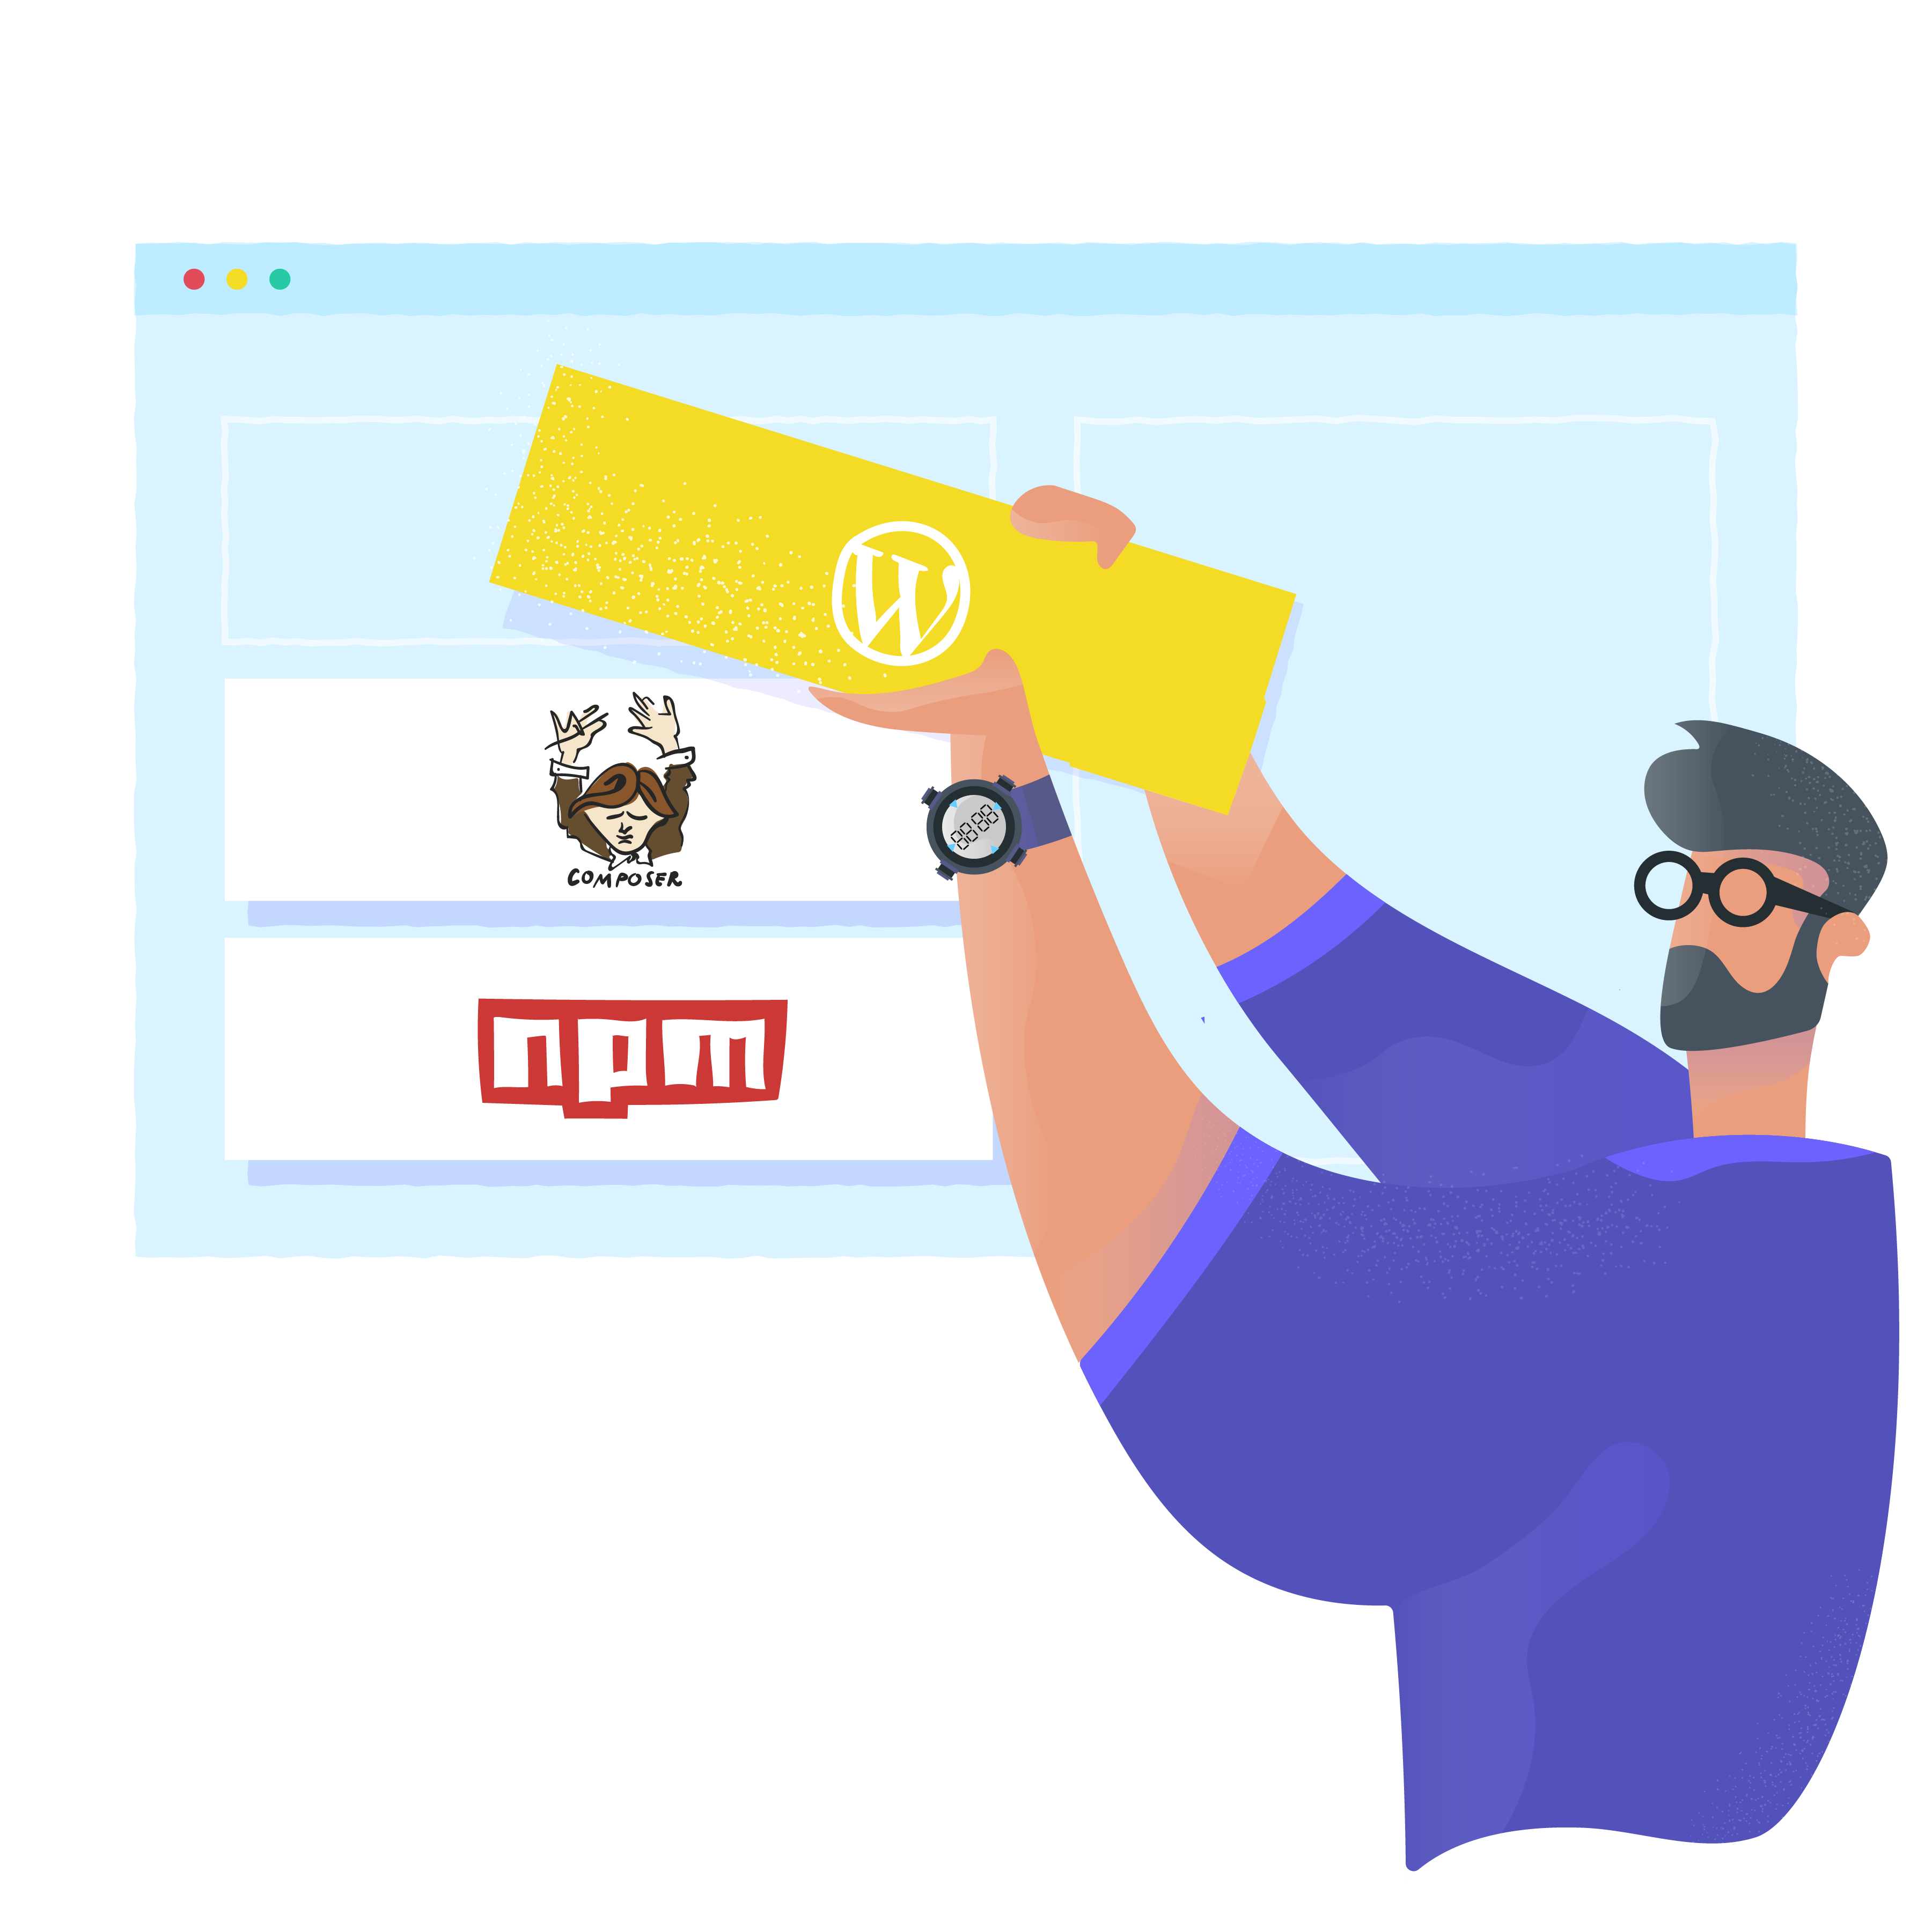
Branch has a range of ready-made build recipes for common use cases, such as compiling frontend assets with NPM or validating your code with the WordPress Coding Standards.
To use an existing build recipe:
- Pick a category in the Add a step section
- Browse through recipes and click one you want to use
- Click Save when you are ready to add it to your build pipeline
Custom build steps
To define your own build steps, click Other in the Add a step section and pick Custom. Fill in the following fields and click Save:
- Name: enter a name for your step
- Environment: select an environment in which to run the step eg
php,node,sshand so on - Commands: add the commands you want to run in this step
Advanced options
You may want to run certain steps on specific Git branches, say if you only want to deploy when pushing to master.
To do so, toggle the Advanced options section of the build step and enter the name of the required branch.
Run your first build
Now you have a few build steps in place, you’re ready to run your first build.
There are two ways to trigger a build on Branch:
- Manually trigger a build: on the project configuration page you can manually trigger a build. This will run a build on your default Git branch (this is set to
master, but can be updated in your project settings). - Automatically, by pushing code to your Git repository: whenever you push new commits to your Git repository, Branch will automatically trigger a build. In this case the build will be run based on the specific commit being pushed. If you push multiple commits, it will build the most current one.
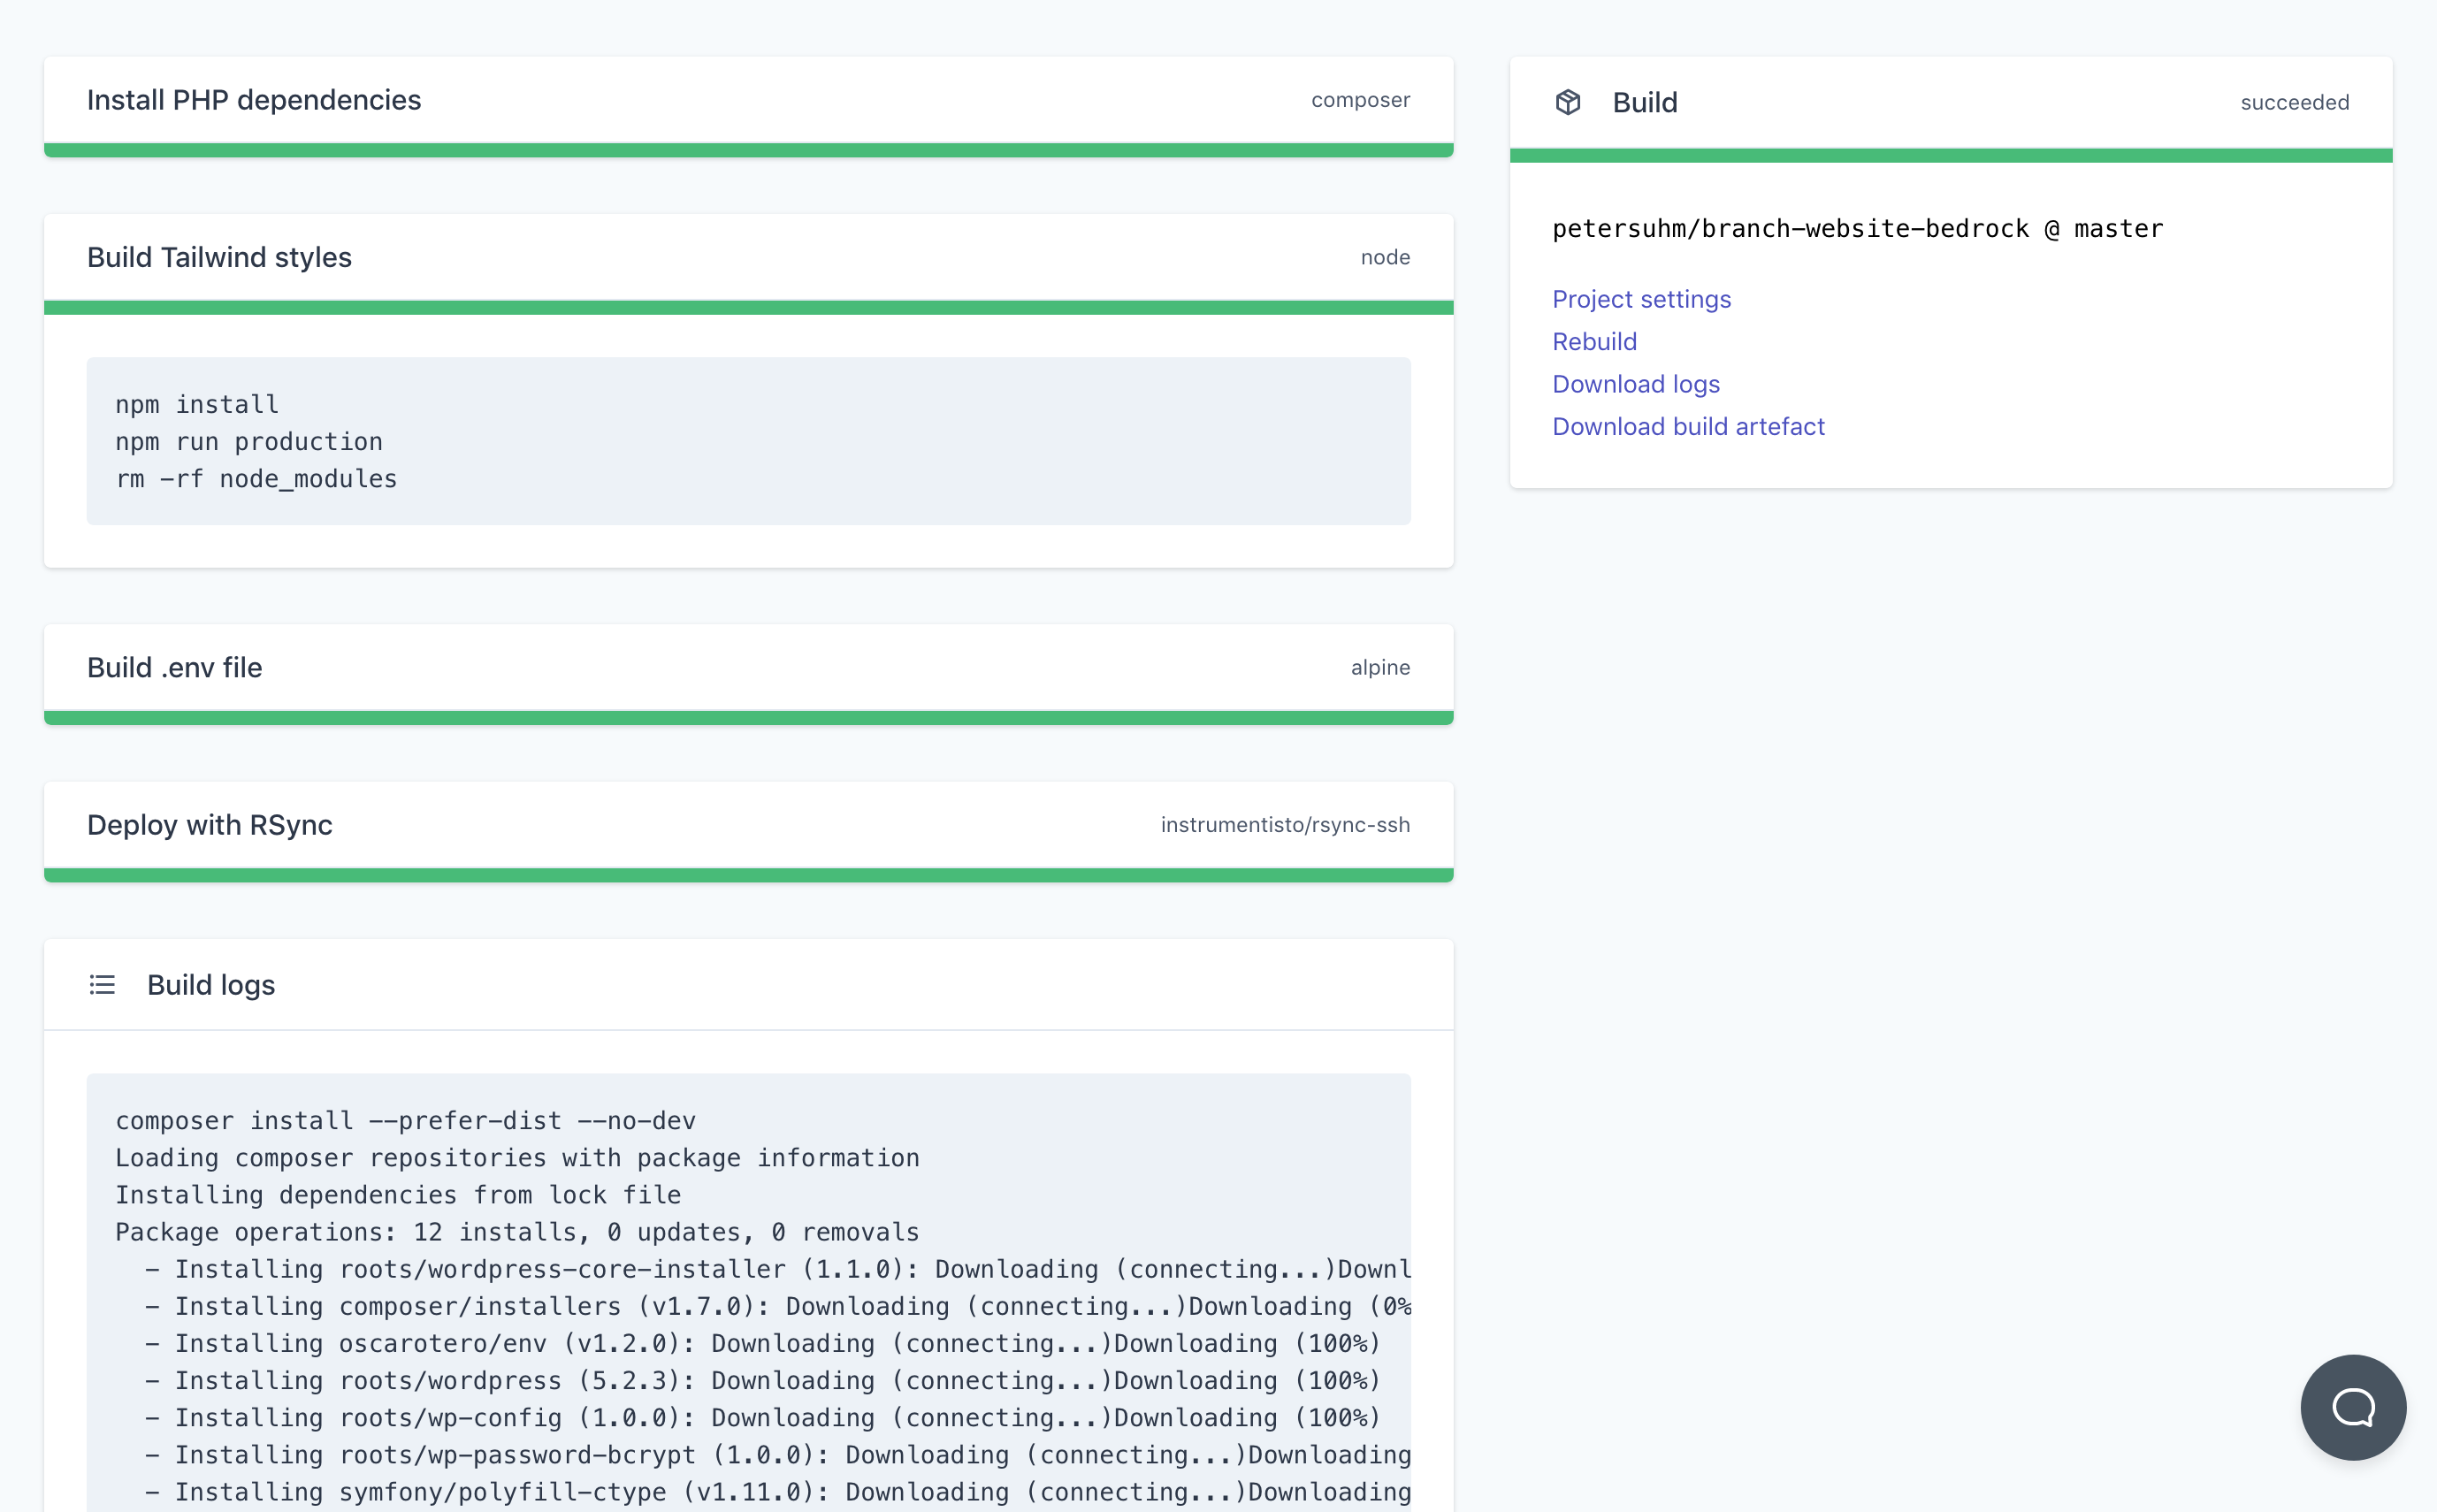
Once the build is running, you can follow its progress on the build overview screen. You can click to expand each step to see which commands are being run. Finally, when the build has either failed or succeeded, you can see the output in the build logs.
What about the database?
Branch doesn’t currently have any built-in mechanisms to handle database migrations. However, many hosting platforms have their own tools and other tools like WP Migrate DB Pro have tried and tested solutions that have been around for a long time.
How can Branch help with database updates?
If your hosting platform supports a workflow where you can easily deploy database changes from a staging site to production, then using Branch to push to staging before using the hosting platform’s built-in tools to deploy to production might be the best option.
Merging databases is not an easy problem to solve and typically, it’s best not to rely too heavily on database changes when deploying WordPress projects.
However, if you have any specific use cases that you are trying to work out, feel free to get in touch to discuss potential solutions. We are only an email away!
Summary
In this guide, you learned how easy it is to sign up for a Branch account. Just head over to branchci.com and sign up with your GitHub, Bitbucket or GitLab account.
We went through the steps to connect Branch to your hosting platform and create your first Branch project. Next, we went through setting up your first build and deploy steps and covered running your first build. Finally, we discussed how to handle database updates.
You can find more information in our platform guides (more coming soon):
Any questions?
We hope this guide has been helpful, but if you still have any questions or feedback, or if you just want to chat about CI/CD, please reach out by clicking the chat icon or by email at hi@branchci.com. Don’t be a stranger!